Since my first article on how to setup WinNUT on Windows, most components have evolved.
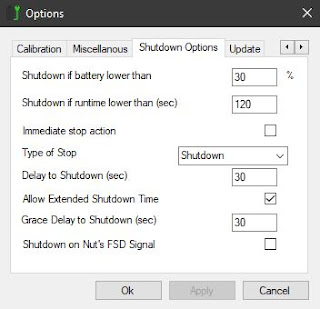
The version 2 of WinNUT is easier to configure than its predecessor. No need to edit a text file anymore, all is done from a unique user interface.
So, here's a refreshed guide on how to set everything up.
Synology Diskstation can talk to most UPS via the USB connector to promptly shut down whenever a power failure occurs. But UPS don't always offer a second connector to do the same with your PC, so a software such as WinNUT client will instead keep track of the UPS state via a network link to DiskStation.
1. Get the latest releases @ gawindx/WinNUT-Client and install it.
Default installation path: C:\Program Files (x86)\WinNUT-client
Log path: %appdata%\WinNUT-Client
2. Configure the client with the right IP to DiskStation and use a limited user dedicated to this task.
The configuration will be saved in the registry and I suggest to make a backup of them by exporting the following registry key: HKEY_CURRENT_USER\SOFTWARE\WinNUT
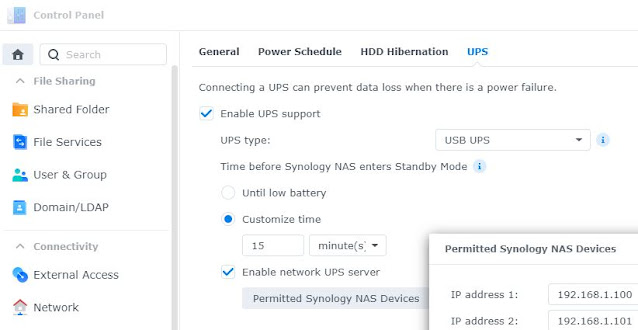
3. Finally make sure that the PC IP address is included in the Permitted Synology NAS Devices (under
Control Panel > Hardware & Power). This feature is initially designed to send the UPS status to other NAS. With WinNUT, the PC just looks like another NAS for DiskStation.


